Two Minute Tuesday: Images in Emails

People often ask our training team how to add their social media icons to their email signatures, or how to put images into their form letters. Today’s Two Minute Tuesday covers using images in HTML emails.

People often ask our training team how to add their social media icons to their email signatures, or how to put images into their form letters. Today’s Two Minute Tuesday covers using images in HTML emails.

If you have any comments or suggestions for something we can explain in about two minutes, send an email to twominutetuesday@mainsequence.net

Video Transcript

It’s time for a fresh Two Minute Tuesday, Main Sequence’s series of short videos with tips, tricks, and tutorials to help make you a more powerful PCRecruiter user.

Today we’re going to look at how you can add images to your emails in PCRecruiter, and particularly how to insert clickable icons for your LinkedIn, Twitter, or other social profiles into your email signature. These same principles apply for adding images to stationery, templates and form letters, and other emails.

But before we get started, a few general pointers about images in emails. Due to the lack of standards across mail reading apps and providers, getting images to show up consistently and reliably is not as simple as you’d expect.

Many email readers, most notably Microsoft Outlook, are set up by default not to download or display inline images until the recipient says it’s ok to show them. For this reason, always assume that none of your images are going to load. We’ll show you how you can supply alternate text to describe the images for those who can’t view them.

As a general rule, using fewer images means more predictable display, reduced chances of triggering a spam filter, and faster sending and receiving, so before inserting any image, decide if you really need it, and leave it out if you don’t.

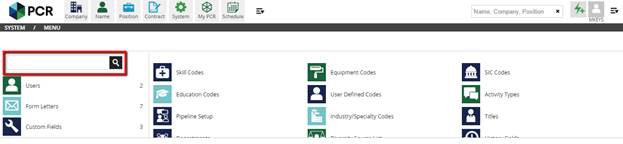
Let’s edit the signature. From the System area, we’ll scroll to ‘Email Setup’ and open ‘Email Signature’. Now we’ll use the ‘Insert Image’ option in the toolbar. We can either use a web-hosted image, or embed a PNG, GIF or JPG file from the local hard drive.

On the “General” tab, we have the option to specify a web URL for the image. This causes the email reader to download the image from the web when the message is received, rather than embedding the image data into the email code. This keeps the message smaller in size, which can really speed things up when you’re sending a bulk mail. It’ll also prevent the image from showing up as an ‘attachment’ for anyone who has embedded images blocked by default, but remember that web-hosted images are hidden or blocked just as readily as embedded ones, so the method of inserting the image won’t likely improve visibility one way or the other. If you don’t have anywhere to store your commonly used logos and icons online, the ‘Server Image Store’, also found under ‘System’ in PCR, can serve in a pinch. The ‘Image Description’ box is where we’ll place the alternate description text for folks who can’t see the picture.

We can also change the display dimensions of the image. Most inbox windows are no more than 400-500px wide, so it’s currently considered best practice to crop or resize to that general maximum width for email use. It’s always better looking, faster loading, and more reliable to resize the actual image file rather than scaling it to a new size when it loads in the email, so if your picture is too big or too small, change the image file rather than using this feature if you can.

The ‘From File’ tab is used for embedding an image into the email directly. To do that, we click and browse. After the image is in place, we can click it and go back to the ‘Insert/Edit Image’ tool to give it that alternate description text in case it’s not displayed.

To make the image a link, we highlight it and then use the ‘Insert Link’ icon. Paste the appropriate URL into the box, and you’re done.

One bonus tip
 what if we want our LinkedIn, Twitter, and Facebook icons to line up side by side? That’s where an invisible table comes in handy. We’ll use the ‘Table’ option in the editor to create a 3 column, 1 row table. Now we can put the images into the cells of the table. The dotted borders we see while editing are guides that won’t show up when the email is sent. Try adjusting the properties of the table and the cells to create the layout you have in mind.

For more Two Minute Tuesdays, watch our blog posts on your PCR login screen, subscribe to this YouTube channel, follow us on Facebook, LinkedIn, or Twitter, and join the PCRecruiter LinkedIn users group. If you have any topics or suggestions for future Two Minute Tuesdays, send an email to twominutetuesday@mainsequence.net.

Two Minute Tuesday: Pipeline Automation

This week’s Two Minute Tuesday introduces you to the power of automation plans in the Pipeline. We’ll show you how to trigger a form letter and place an applicant on a list based on their movement from one stage of the recruitment process to another.

This week’s Two Minute Tuesday introduces you to the power of automation plans in the Pipeline. We’ll show you how to trigger a form letter and place an applicant on a list based on their movement from one stage of the recruitment process to another.

If you have any comments or suggestions for something we can explain in about two minutes, send an email to twominutetuesday@mainsequence.net

Video Transcript

It’s another Two Minute Tuesday, Main Sequence’s series of short videos with tips, tricks, and tutorials to help make you a more powerful PCRecruiter user.

Automating common tasks saves you time, and since a lot of your time in PCRecruiter is spent in the Pipeline, automating your Pipeline tasks can save you a lot of time. We looked at configuring the Pipeline Statuses in an earlier video, and today we’re going back to them to talk about Automation Plans. Automation Plans are simply a checklist of tasks for the system to perform when a specific trigger has occurred. Automations can be triggered by Pipeline moves, Rollup Stage changes, Profile submissions, and certain job board actions.

Here in our Pipeline, we’ve made a Status under the Out-of-Process type called “Turndown” which our recruiters use to indicate those candidates who were not interested in the offer. We’d like to send these Candidates a Form Letter thanking them for their time, and also place them on a Rollup so that we can easily find the people who’ve turned down previous offers, or perhaps filter them out of a search, if we should want to in the future.

To create the Automation Plan, we’ll head to System from the main menu, and we’ll search for Pipeline Setup. The configuration icon in the Action menu will take us to the ‘Manage Automation Plans’ screen. Now we’ll click ‘Add’ to create a Plan.

By default, an Automation Plan will run “automatically” without any user interaction, but we can check this box to insert a user acknowledgement popup before the Plan is run. This can be helpful if you’re creating an automation that you might want to skip on occasion, or if you just want to notify the user that they’re about to trigger an action.

Next, we’ll use this selector to choose from the available Statuses that we’ve configured for this database. Here we’ll expand the Out-of-Process type, and select our “Turndown” Status code.

Now we need to tell PCR what the Plan should do. In our case, we want to add the Candidate to a Rollup and send them a Form Letter. There are two emailing options in the Automation Plan – this first one is for sending a simple, plain-text email with no field data merged into it. This is good for generic notifications, but not useful for our purposes, so we’ll skip over that. We do want to use this ‘Copy to Rollups’ area though, so we will check this box at the far right to activate this section, and we’ll use the picker to choose the Rollup we want the Candidate added to.

Next, we’ll check the box to activate the Send Form Letter section. This box lets us choose an alternate email field from the Name record, but since we want to send the letter to the email stored in the Candidate’s standard Email Address field, we can leave the box alone. For the ‘From’ email, we want this letter to come from the person whose username is associated with the job. Finally, we’ll use the ‘Form Letter Name’ box to select the Form Letter we want to send from the ones we’ve created in this database. We can optionally override the name of the Form Letter with some other arbitrary subject line. Then, we save the Plan.

Going forward, when any user drags a candidate into the “Turndown” Status on the Pipeline, the Form Letter we’ve selected will be emailed to them, and they’ll be added to the designated list.

For more Two Minute Tuesdays, please follow us on Facebook or Twitter, join the LinkedIn PCRecruiter Users group, subscribe to this YouTube channel, and watch our blog posts on your PCR login screen. If you have any ideas for future Two Minute Tuesdays, send an email to twominutetuesday@mainsequence.net.

Two Minute Tuesday: Profile Form Basics

This week’s Two Minute Tuesday video looks at the rudiments of creating and completing a Profile form. This is a high-level overview of a very deep feature, so we’ll get into more about Profiles in a later edition.

This week’s Two Minute Tuesday video looks at the rudiments of creating and completing a Profile form. This is a high-level overview of a very deep feature, so we’ll get into more about Profiles in a later edition.

If you have any comments or suggestions for something we can explain in about two minutes, send an email to twominutetuesday@mainsequence.net

Video Transcript

It’s time for Two Minute Tuesday, Main Sequence’s series of short videos with tips, tricks, and tutorials to help make you a more powerful PCRecruiter user.

Today we’re talking about the basics of Profiles. These are customizable, searchable forms that can be attached to names, companies, or jobs. Profiles for Names can also be completed directly by the contact via an emailed link or while applying to an online job posting. Profiles are great for skills checklists, candidate data sheets, phone calling scripts, and storing supplemental details for jobs and companies. They can trigger automations for sorting purposes, and with custom HTML applied, they can even be used for candidate presentation.

First let’s see how a Profile is used. From the Name record, we’ll pick ‘Submit Profile’ in the Action menu, and then pick from the list of the available forms we’ve created. After saving, the completed form appears in the attachments area of this record for editing or viewing. The text of the selected answers and text boxes is now searchable keyword content, just like this person’s resume and notes. If we search for one of the answers marked off in the form using the keyword search, we’ll find the records whose Profiles contain that text.

These forms are created from the ‘Profile Setup’ area under System. We click the ‘Plus’ to add a new form, and give it a name. You may also want to change the ‘Profile Type’ – in the ‘single’ mode, each record in the database can have just one of this form attached, while ‘multiple’ mode lets you attach many copies to the same record. Another important item is the ‘Allow Update’ checkbox. If you add, remove, or reword questions and answers in a Profile, the records that already have a completed copy attached will not reflect your new changes unless this box is checked. If it’s unchecked, the questions and answer options in the completed forms will remain as they were at the time when they were filled out.

Once we save the initial settings screen, we can build the form with the ‘Questions’ sidebar item. In the “Add Question’ popup, we put the text of the question into the left box, and if there are multiple answer choices, they go to the right – one answer per line. Below the answer box, we can specify the type of answer
 single line, checkbox, multi-line text area, and so on
 and if the question is required for the form can be saved. If it’s a required question and a dropdown, using ‘(Please Select)’ as the first option indicates to the system that nothing has been picked yet.

As we discussed earlier, all Profile answers are keyword searchable, but if you want the answer to any single-line or multiple-choice question to be copied into a distinct field on the record for visibility, searching, or reporting purposes, you can link this answer to that field. Just be aware that this only saves the Profile answer into the field, and not the other way around. Once the Profile has been completed for a specific record, changes to this answer in the Profile will update the linked field, but changes directly to the field will not be reflected in the attached Profile.

When we’re done adding questions, they can be re-ordered by dragging them up and down, and they can be removed completely by clicking the trash icon.

As you can see, there are many more options available on these setup screens, and you can expect a video about advanced Profile tricks in the future, but that’s all for this week’s Two Minute Tuesday. Please follow us on Facebook or Twitter, join the LinkedIn PCRecruiter User group, subscribe to this YouTube channel, and watch our blog posts on your PCR login screen. If you have any ideas for future Two Minute Tuesdays, send an email to twominutetuesday@mainsequence.net.

As we previewed in this week’s Two Minute Tuesday video, a new update to PCRecruiter comes out today. While there are many fixes, improvements, and tweaks, we wanted to call attention to a few of the more noticeable items:

Tab Labels

Our new labeling system will appropriately title your PCRecruiter tabs or windows in your web browser, allowing for an easier distinction between name records, company records, and other windows.

Tab Labels

Recently Viewed Records

The area to the right of the main Name, Company, and Position search boxes, which used to show your 10 most recently viewed records, now shows up to 50 records, along with the company and email address for names, and the company for positions. Use the dots or arrows to navigate, or click and drag. Watch for more enhancements to this area in later updates.

Recently Viewed

System Menu Searching

Admin users may notice that the System menu has been reorganized. Most importantly the search box can now be used to find any and all items under this area.

System Area Search

Mobile App

A new edition of our free PCRecruiter mobile app for iOS and Android is out, and packs some speed improvements, as well as these handy new functions:

Parsing Resumes from Email

Copy to PCRResumes can be added and parsed through your mobile device’s native email client, creating new name records easily on the go.

  1. From within your device’s email client, locate an email with an attached resume that you would like to add to PCRecruiter.
  2. Click and hold the resume attachment until your device’s action menu appears.
  3. Choose Copy To PCRecruiter
  4. When the app loads, choose how you would like to import the record:
    • Inhale Resume: This option quickly parses the contact info and adds the record to your Default Company without any user interaction.
    • Parse And Verify Resume: This option allows you to view, edit, and add to the record details before import, as well as specifying a Company, Position, and/or Rollup List that you would like to add the record to.
  5. Save your new record

View and Add Names to a CompanyAdd Name - Mobile

  1. To search for a Company record, select the menu icon from the top right corner. This will open your side navigation panel. Select Company, and then choose Search.
  2. From this screen, you can search by Company Name or keywords (notes, summaries, keywords and profiles.)
  3. Select the desired Company from the results list.
    • Select the Names option at the bottom of the window to view all contacts within that company.
    • To add a Name select the Add Name icon at the bottom of the window, and then enter the specified contact information before saving your new contact.


Two Minute Tuesday: September 2016 Update

In this Two Minute Tuesday, we’ll take a departure from tutorials to show you a few of the more noticeable improvements to PCRecruiter that appear in our September update, due out this week.

In this Two Minute Tuesday, we’ll take a departure from tutorials to show you a few of the more noticeable improvements to PCRecruiter that appear in our September update, due out this week.

If you have any comments or suggestions for something we can explain in about two minutes, send an email to twominutetuesday@mainsequence.net

Video Transcript

We’re back with a fresh Two Minute Tuesday, Main Sequence’s series of short videos with tips, tricks, and tutorials to help make you a more powerful PCRecruiter user.

This week we’ll take a departure from tutorials to show you a few of the more noticeable improvements to PCRecruiter that appear in our September update.

One change you’ll notice right off the bat is in the ‘Recently Viewed’ tiles that appear in the main Name, Company, and Position search screens. Where the previous versions of PCR would display only the most recent ten records viewed, the new version shows up to fifty. How many you’ll see at once depends on your available screen size, but you can use these arrows or dots to navigate, or even click and drag to see more. Look for more functions and enhancements coming to this area soon.

Another tweak you may find helpful is that the titles for your browser windows will now indicate the name of the PCRecruiter record they display. So, for example, when we right-click on this position and open it in a fresh tab or window, the browser tab displays the title and position ID. The same goes for Names, Companies, Rollups, and others. If you’re the sort of user who keeps multiple PCRecruiter tabs open at once, this will help you keep them straight.

We’ve also added some new features to the free PCRecruiter mobile app for Android and iOS, in addition to a round of speed and stability improvements.

First off, when you’re on a company record, you can now tap the ‘Names’ option at the bottom to see the people associated with that company, and you can tap the new ‘Add’ icon to create new contact records directly within the current company.

We’ve also got PCRecruiter integration into the native email application. When you select a resume file attachment from a message on your device, you’ll find that the PCRecruiter app is available as a target for handling it. After selecting “Copy to PCRecruiter,” you’ll get the option to simply ‘Inhale’ the resume into the default company as a new candidate, or to use something more like the ‘Add Resume’ utility to parse the contact info from the resume and verify or enhance it with more detail. If you select this option, you can also add the new record to a specific Company, Position pipeline, or Rollup list on the fly.

We have some very exciting new features to announce before the end of the year, so to keep on top of everything, watch our blog posts on your PCR login screen, subscribe to this YouTube channel, follow us on Facebook, LinkedIn, or Twitter, and join the PCRecruiter LinkedIn users group. If you have any topics or suggestions for future Two Minute Tuesdays, send an email to twominutetuesday@mainsequence.net.